
内核参数 /etc/sysctl.conf
针对 2G 内存 + 单网卡优化,整合 BBR、缓冲区、conntrack、TIME_WAIT 等参数。(这部分 AI 给的,最好还是按自己的机器让 AI 给个合理的数值)。
sudo tee /etc/sysctl.conf > /dev/null << 'EOF'
# ============================================
# IPv6
# ============================================
net.ipv6.conf.all.disable_ipv6 = 1
net.ipv6.conf.default.disable_ipv6 = 1
net.ipv6.conf.eth0.disable_ipv6 = 1

# ============================================
# 转发 & BBR
# ============================================
net.ipv4.ip_forward = 1
net.core.default_qdisc = fq
net.ipv4.tcp_congestion_control = bbr

# ============================================
# 缓冲区(2G 内存适配,上限 8MB)
# ============================================
net.core.rmem_max = 8388608
net.core.wmem_max = 8388608
net.ipv4.tcp_rmem = 4096 87380 8388608
net.ipv4.tcp_wmem = 4096 65536 8388608
net.core.netdev_max_backlog = 4096

# ============================================
# conntrack(NAT 转发必需,默认 65536 偏小)
# ============================================
net.netfilter.nf_conntrack_max = 131072
net.netfilter.nf_conntrack_tcp_timeout_established = 7200

# ============================================
# TIME_WAIT & 端口回收
# ============================================
net.ipv4.tcp_tw_reuse = 1
net.ipv4.tcp_fin_timeout = 15
net.ipv4.tcp_max_tw_buckets = 16384
net.ipv4.ip_local_port_range = 1024 65535

# ============================================
# 反向路径过滤(关闭,防止内网转发丢包)
# ============================================
net.ipv4.conf.all.rp_filter = 0
net.ipv4.conf.default.rp_filter = 0
EOF

sudo sysctl -p
上述是开启BBr等参数设置,优化数据转发。建议 ssh 上机后直接开启。
参数说明:
BBR + fq :提升 TCP 吞吐量
缓冲区 8 MB :2G 内存下的合理上限,满足百兆级转发
conntrack 131072 :NAT 连接跟踪上限,约占 40MB 内存
tcp_tw_reuse :允许复用 TIME_WAIT 端口,防止端口耗尽
rp_filter = 0 :关闭反向路径过滤,避免内网包被误杀
nftables 转发规则 /ect/nftables.conf
使用 map 映射 + masquerade。
sudo tee /etc/nftables.conf > /dev/null << 'EOF'
#!/usr/sbin/nft -f

flush ruleset

table ip nat {

    # ============================================
    # 端口映射表(新增/删除落地只改这里)
    # 格式: 入口端口 : 落地IP . 落地端口
    # ============================================
    map port_to_dest {
        type inet_service : ipv4_addr . inet_service
        elements = {
            54321 : 1.1.1.1 . 12345,   # HK-1
            54322 : 2.2.2.2 . 12345,   # HK-2
            54323 : 3.3.3.3 . 12345,     # JP-1
        }
    }

    chain prerouting {
        type nat hook prerouting priority dstnat; policy accept;
        meta l4proto { tcp, udp } dnat to th dport map @port_to_dest
    }

    chain postrouting {
        type nat hook postrouting priority srcnat; policy accept;
        meta l4proto { tcp, udp } masquerade
    }
}
EOF
加载并设置开机自启
sudo nft -f /etc/nftables.conf && sudo systemctl enable nftables && sudo systemctl restart nftables日常维护
热添加 / 删除落地(无需重载配置文件)
# 新增
sudo nft add element ip nat port_to_dest { 54324 : 4.4.4.4 . 998 }

# 删除
sudo nft delete element ip nat port_to_dest { 54324 : 4.4.4.4 . 998 }
热更改重启后会丢失,确认无误后同步回 /etc/nftables.conf ,及更改 /etc/nftables.conf 中 elements 的转发内容后,设置 udo nft -f /etc/nftables.conf
查看当前规则
# 完整规则
sudo nft list ruleset

# 仅查看 map
sudo nft list map ip nat port_to_dest
验证内核参数
sysctl net.ipv4.tcp_congestion_control    # 应显示 bbr
sysctl net.netfilter.nf_conntrack_max     # 应显示 131072
上面是基于手搓式的设置 nft 转发,还可以使用一键脚本。
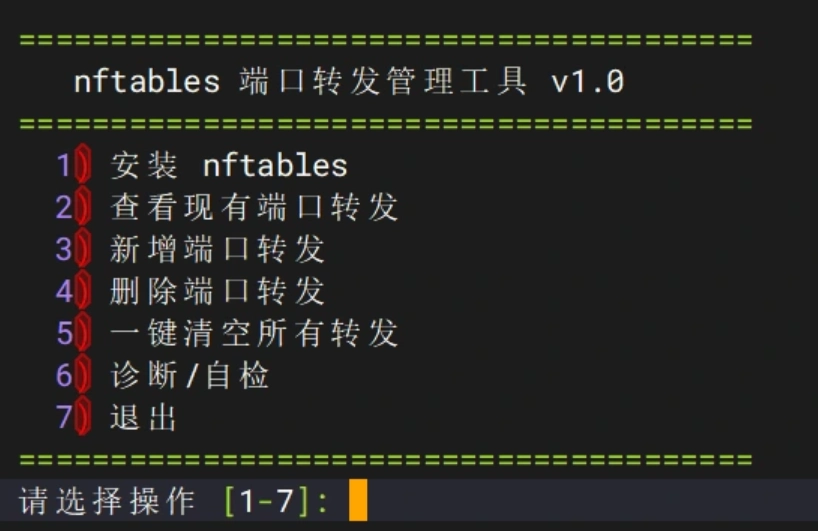
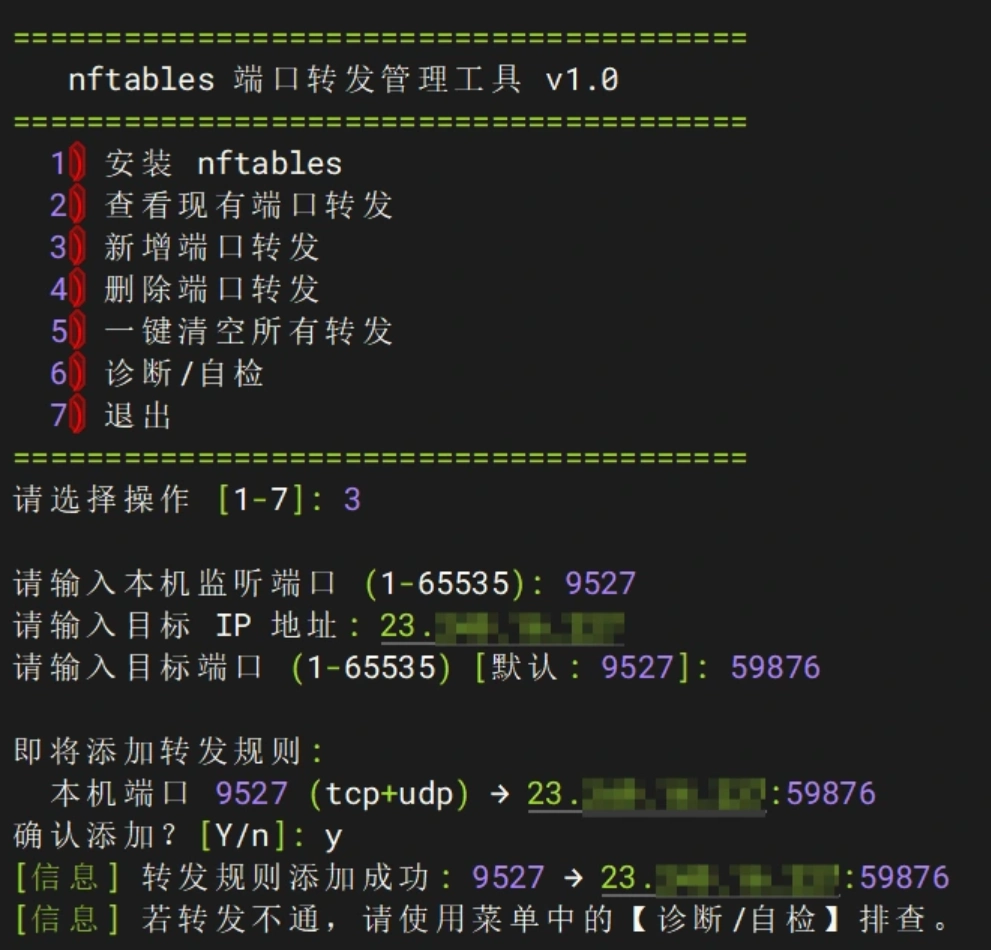
一键脚本
在上文设置好 BBr 设置的基础上,运行脚本
curl -L http://script.gu.ax:2052/nftables.sh -o nft.sh && chmod +x nft.sh && ./nft.sh之后输入 1 安装 nft 转发。